
Labor Day Crafts
Use this with our Labor Day Lesson

Labor Day Sunday School Crafts
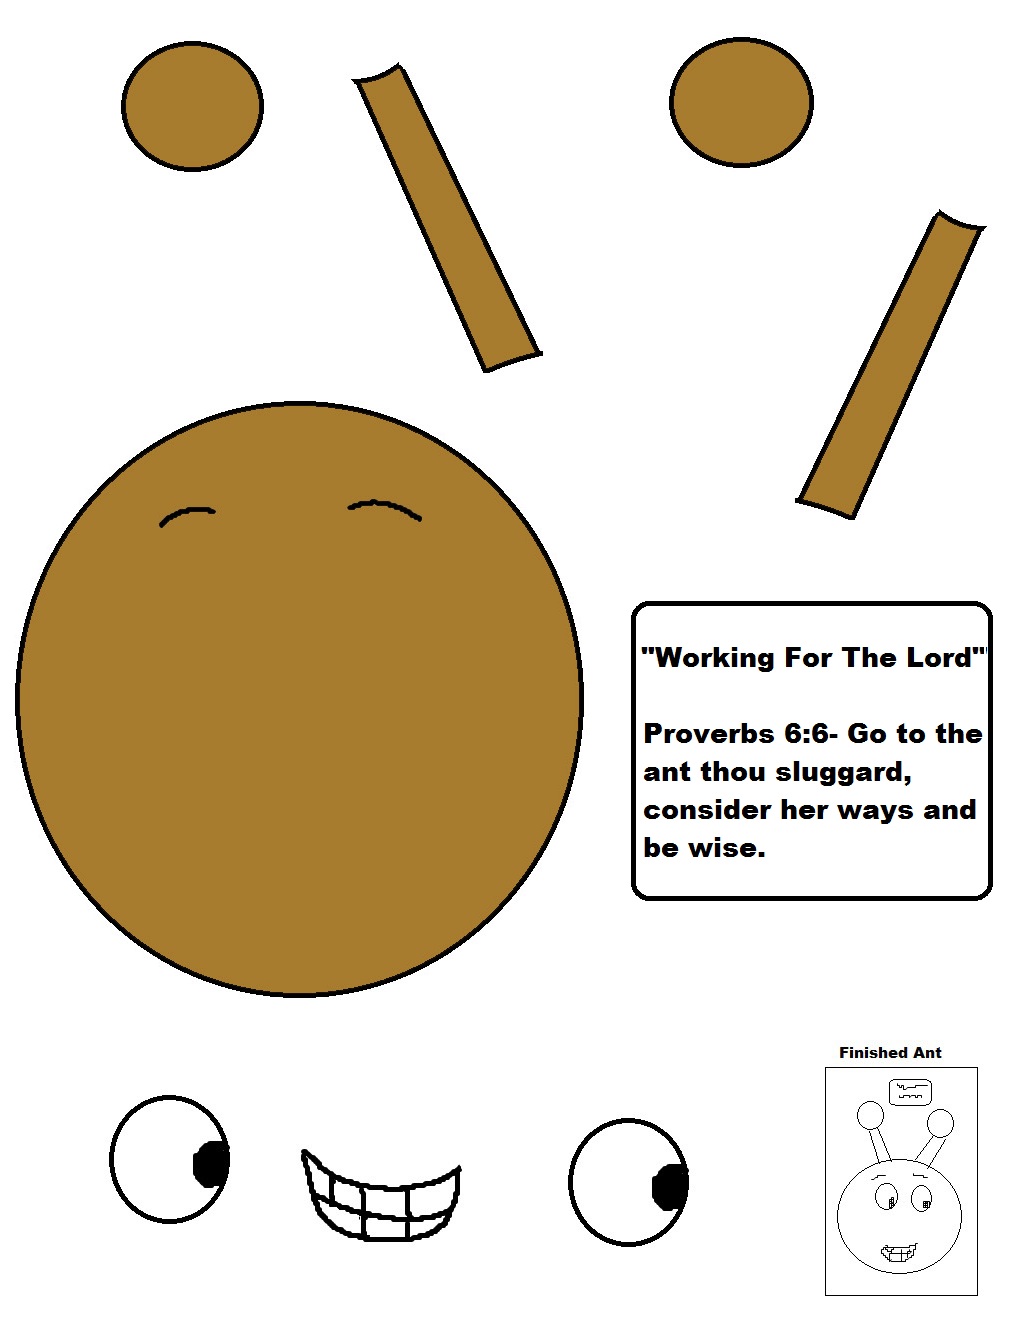
Printable Ant "Working For The Lord" Activity Page
Just cut the pieces out and glue down on construction paper. Assemble the ant body together. Add the black arms and legs to the body. Use this with our Labor Day Sunday School Lesson.

Labor Day Sunday School Crafts
Printable Ant "Working For The Lord" Activity Sheet
Just cut the ant pieces out and assemble on construction paper. Use this with our Labor Day Sunday School Lesson.
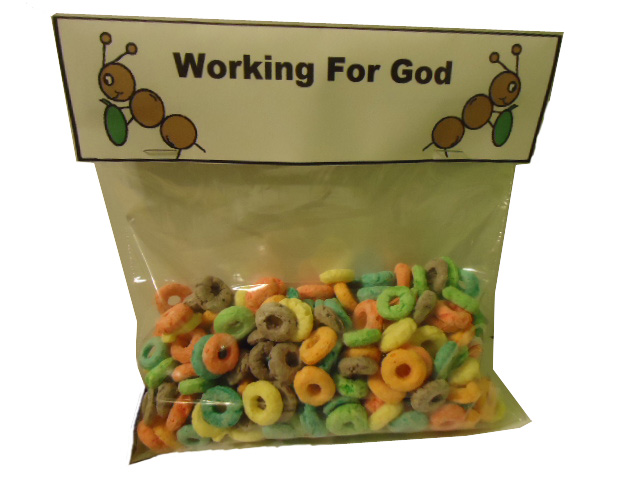
Labor Day Sunday School Crafts
Make this snack up for the kids in Sunday school when teaching on the Labor Day Sunday School Lesson.

Labor Day Sunday School Crafts
Ant "Working For The Lord" Toilet Paper Roll Craft
Use this fun craft to go with our Labor Day Sunday School Lesson.
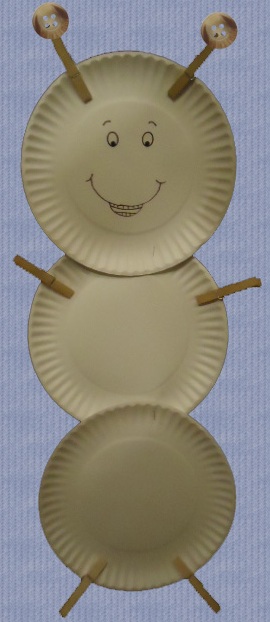
Labor Day Sunday School Crafts
Paper Plate Ant
Use this craft with the Labor Day Sunday School Lesson.
Just staple 3 paper plate together. Pin 6 clothespins to the ant for his arms, legs, and antennas. Draw some eyes and mouth for the ant. Write the words "Working For The Lord" across the middle paper plate. Tape or hot glue a round brown button for both antennas. You can have the kids color the paper plates brown if you want.

Labor Day Sunday School Crafts
Ant "Working For The Lord" Doorknob Hanger Craft
Use this craft to go with the Labor Day Sunday School Lesson.

Labor Day Sunday School Crafts
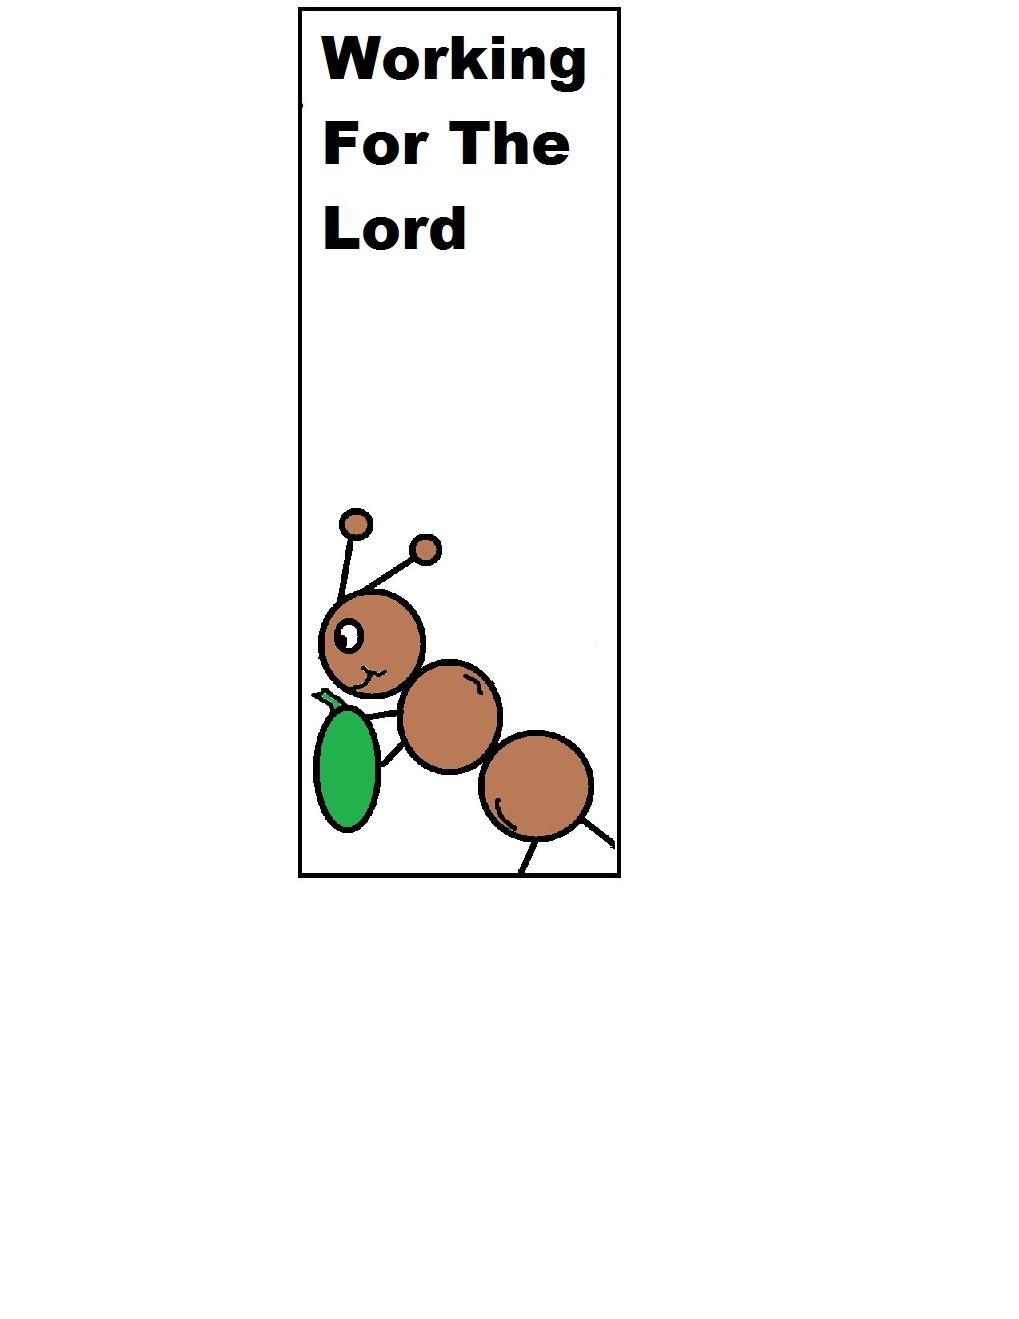
Ant "Working For The Lord" Bookmarks
Print these out and let the kids color the background and then laminate them. If you are not able to laminate then just print them on cardstock. Use this with our Labor Day Sunday school Lesson.
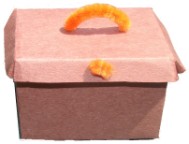
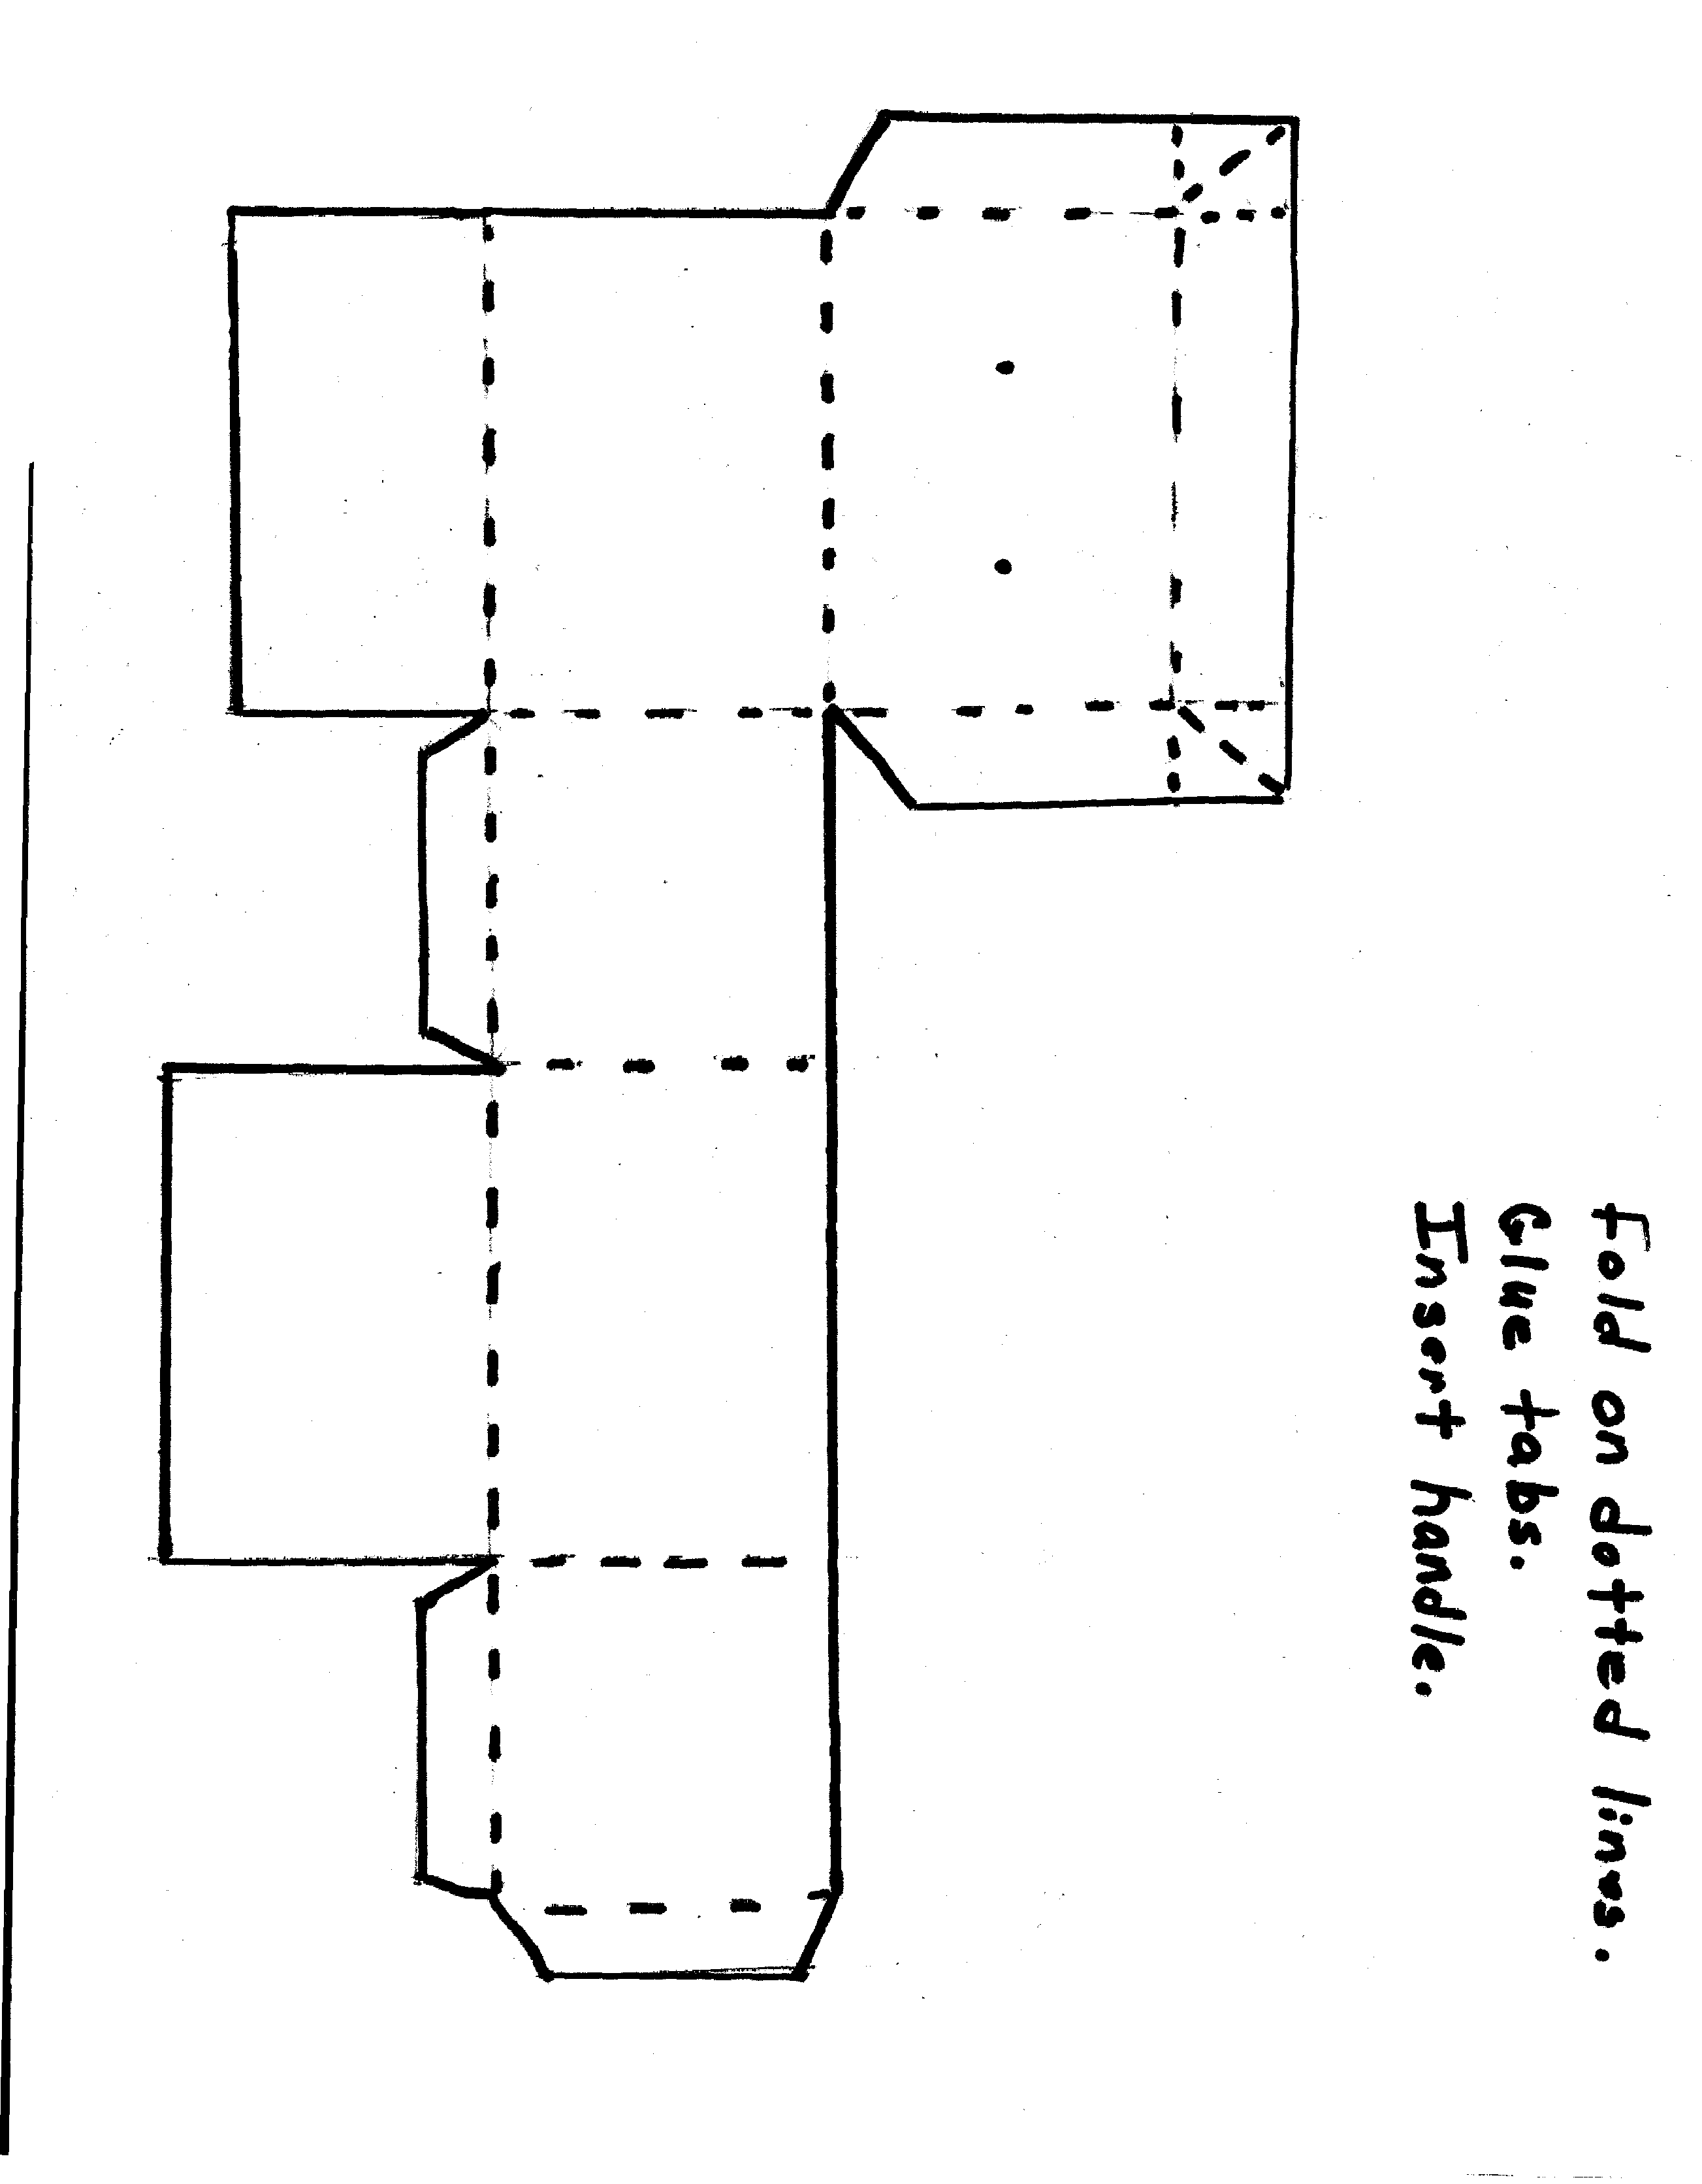
Labor Day Sunday School Crafts
Toolbox Craft Template
Use this craft with our Labor Sunday School Lesson
- Construction paper or card stock
- Pipe stems cleaners (chenille stems)
- Template
- Glue stick
- Brass paper fasteners (optional)
- Paper clip or large needle
Print out the template for the toolbox and copy it on construction paper or card stock. Cut out along the solid lines. Fold the paper along the dotted lines. Glue together at the tabs. ( I had to use a few pieces of tape.) If you have a problem making a mitered corner on the lid, just cut along the angled dotted lines in the corner and fold under before gluing. Use a needle or straighten paper clip to make small holes at the dots on top of the lid for the handle and at the front for the fastener. Cut a pipe stem cleaner in two pieces. For the handle, insert the pipe stem cleaner through the holes in the top of the lid and twist it together on the underneath side. Use the brass fasteners or a bent piece of chenille stem to make a closure for the lid.